Articles
Tile 101: Selecting, Installing & Caring for Tile
This guide covers ceramic vs. porcelain, when natural stone is worth it, the right trim pieces, and how often to seal your tile so it lasts and so much more.

Did you know some of the tile in your home formed underground for millions of years before anyone poured a foundation? Then it got quarried, cut, and finished into something you’ll walk across every single day. Pretty cool, right?
Most people don’t think about tile until they’re standing in a showroom, staring at a wall of samples, wondering what “rectified” means and whether they need to seal anything.
This guide helps you understand the real difference between ceramic and porcelain, when natural stone earns the extra care it demands, which trim piece finishes a job cleanly, and how (and how often) to seal your tile so it still looks new in ten years. No sales pitch, no jargon left unexplained. Just what you need to choose with confidence before you buy.
Why Tile?
Before getting into types and terminology, it’s worth naming why tile keeps winning against every other flooring and wall material on the market.
It’s genuinely healthier to live with. Tile is made from natural ingredients, contains no VOCs or PVC, and won’t trigger the allergies that carpet fibers and some engineered materials can. It’s non-flammable and heat-resistant, which matters more than people expect near a stove or a fireplace surround.
It’s also easier to live with day-to-day. A quick wipe or mop handles most messes, and a well-installed tile surface will outlast the trends. Add in the sheer range of colors, textures, and formats available, plus a price point that fits nearly any budget, and it’s clear why tile isn’t just a safe choice. It’s usually the smart one.
Ceramic vs. Porcelain Tile
Ceramic and porcelain both start as clay, but they’re fired differently, and that difference shows up the moment you start living on them. Porcelain is made from a denser clay body fired at a higher temperature, which makes it harder, less porous, and more resistant to wear, chips, and cracks than ceramic. That density is also why porcelain handles both indoor and outdoor installations, while standard ceramic is generally kept indoors.
Water resistance follows the same logic: porcelain’s low porosity makes it the safer pick for showers, bathroom floors, and anywhere moisture is a daily fact of life. Ceramic still performs well in most residential spaces, including kitchens, backsplashes, and lower-traffic floors, and it’s typically easier and cheaper to cut, which matters if a project is DIY.
Cost is the other deciding factor: ceramic is usually the more budget-friendly option, while porcelain’s durability commands a higher price per square foot. Neither is objectively “better.” The right call depends on where it’s going and how hard it’ll be worked.
| Ceramic | Porcelain | |
| Clay body | Fired at lower temp | Denser, fired at higher temp |
| Durability | Good | Excellent — more chip/crack resistant |
| Water resistance | Moderate | High — best for wet areas |
| Best use | Indoor, lower traffic | Indoor/outdoor, high traffic, wet areas |
| Ease of cutting | Easier | More difficult |
| Cost | Lower | Higher |
Natural Stone Tile
Natural stone is quarried directly from the earth, not manufactured or printed, meaning no two pieces are ever quite alike, because each one was shaped by geology over millions of years. That’s exactly why people love it, and exactly why it asks a little more of the people who install and care for it.
Marble Tile
Marble is available in polished, honed, or brushed finishes, and its veining, called Carrara, Calacatta, and Emperador, are the perennial favorites. These are what most people picture when they think “luxury.” It’s also relatively soft (roughly a 3–5 on the Mohs scale), so it can etch from acidic spills and scratch under heavy use. Rectified marble tile allows tight grout joints (as narrow as 1/16″) for a seamless look. Best for: bathroom floors and walls, feature walls, foyers, and other lower-traffic spaces.
Travertine Tile
Travertine comes filled and honed, unfilled, or tumbled, in warm beiges, creams, and walnut tones. It naturally forms with small holes and voids — a common question from first-time buyers, and worth explaining up front rather than letting it come as a surprise at install. Tumbled travertine leans into that texture for an old-world, rustic look. Best for: bathroom floors, pool surrounds, patios, and backsplashes.
Slate Tile
Slate has a naturally cleft (textured) surface, making it one of the most slip-resistant natural stones available, in colors ranging from charcoal and black to rust and green. Its irregular thickness can make installation a bit trickier, so an experienced installer matters more than with other stones. Best for: outdoor areas, mudrooms, and rustic interiors.
Limestone Tile
Limestone is soft, muted, and far more uniform in tone than marble, which makes it easier to match across a large floor. It’s also highly porous, which makes sealing a must rather than optional. Best for: large-format floors, spa-style bathrooms, and feature walls.
Stone Finishes: Polished, Honed, Tumbled & More
| Finish | Look | Feel | Best for |
| Polished | Glossy, reflective | Smooth | Walls, low-traffic floors |
| Honed | Matte, flat | Smooth | Floors, counters |
| Brushed/Antiqued | Soft sheen | Slightly textured | Transitional spaces |
| Tumbled | Rustic, worn | Rough edges | Patios, old-world baths |
| Leathered | Subtle texture | Grainy | Counters, feature walls |
What to Expect from Natural Stone
A few things are worth knowing before the material arrives, so nothing feels like a surprise mid-project:
- Variation is normal, not a flaw. No two pieces are identical — fissures (naturally occurring hairline marks, different from cracks), small pits and voids in travertine and limestone, and mineral veining are all natural characteristics, not defects.
- Order from one lot and blend as you go. Because pieces vary, pulling from a few boxes at once as you install gives a more balanced, intentional look than laying one box at a time.
- See it wet before you decide. Water reveals a stone’s true installed color and deepens its veining — dry tile in a showroom often looks lighter and chalkier than it will once it’s sealed and installed. Ask to see a wet sample before committing.
- Sealing is quick, not a chore. Sealing a stone floor takes about 20 minutes a year for most homes — a small trade-off for a material that will otherwise last generations. (More on exactly how in the sealing section below.)
Rectified vs. Non-Rectified Tile Edges
A rectified tile has been mechanically cut after firing, giving it a precise, uniform size and a sharp, straight edge. Non-rectified tile keeps its molded edge straight from the kiln, which means slightly rounded corners and a bit more size variation from piece to piece.
That difference shows up most in the grout line: rectified tile allows thin joints and a clean, modern look, while non-rectified tile needs a wider joint (1/8″ or more) to accommodate its natural variation, giving a softer, more classic look. Rectified tile also demands more precise installation work, while non-rectified tile is more forgiving of small inconsistencies in the subfloor or wall.
Neither is the “correct” choice. It comes down to the look you’re after and how much tolerance your installer wants to work with.
| Rectified | Non-Rectified | |
| Edge | Sharp, straight | Slightly rounded |
| Size consistency | Very precise | Slight variation |
| Grout lines | Thin | Wider (1/8″ or more) |
| Look | Clean, modern | Softer, classic |
| Install difficulty | More precise work required | More forgiving |
Tile Terminology to Know
A handful of terms come up constantly once you start shopping, and knowing them ahead of time makes every showroom conversation faster and more useful.
- Through-body / color body — the color runs all the way through the tile, not just on the surface, so a chip is far less noticeable.
- Variation — how much the shade and pattern differ from piece to piece within the same tile line.
- Mosaic mounting — how small-format tiles are held together on a sheet: mesh-mounted, face-mounted, or dot-mounted.
- Format — simply the tile’s size (12×24, 24×24, and so on).
- Waterjet cut — tile precision-cut with a high-pressure water jet, often used for intricate inlays or medallions.
- Fluted — tile with a ridged, textured surface, popular for accent walls.
- Dimensional — tile with raised or sculpted texture and visible relief.
- Calibre (calibrated) — tile sorted to a precise, consistent thickness.
Surface Finish Guide
Finish affects both look and function — how a tile reflects light, and how safe it is underfoot when wet.
- Undulated — a gentle wave or texture across the surface.
- Unglazed — no glossy coating; color and texture run through the material itself.
- Matte — flat, non-reflective finish.
- Honed — smooth, low-sheen, satin-like finish.
- Polished — high-shine, reflective finish.
- Glossy — shiny, light-reflective surface.
- Satin — a soft sheen between matte and glossy.
- Lappato — partially polished, blending a matte and glossy look in one tile.
As a rule of thumb: the glossier the finish, the more slip risk it carries when wet, so save polished and glossy finishes for walls and low-traffic areas and lean toward matte or honed for floors and wet rooms.
Tile Trim & Finishing Pieces
Trim pieces are the difference between a job that looks finished and one that looks unfinished — they cap edges, wrap corners, and bridge transitions between rooms and materials.
Bullnose Tile & Border Pieces
Bullnose tile has one finished, rounded edge and is the standard choice for capping an exposed edge, like the end of a backsplash row or a windowsill. Double bullnose has two rounded edges, used where two exposed edges meet at an outside corner. For a slimmer, more decorative border, a jolly (pencil rail) strip finishes an edge with a narrow profile instead of a rounded one.
Corner & Transition Pieces
An inside corner (cove base) creates a curved transition where floor meets wall, while an outside corner covers exposed corners where two tiled surfaces meet at an outward angle. Quarter round moldings do similar work at floor-wall junctions with a smaller, decorative profile.
Where two different floors meet, transition pieces take over: a reducer steps down from a thicker tile floor to a thinner material like hardwood or vinyl, a T-molding bridges two floors of equal height in a doorway, a threshold (saddle) forms a flat transition bar between two floor types, and an end cap finishes the exposed end of a tile run at a doorway or room edge.
For stairs, step nosing gives treads a rounded, non-slip front edge, and a full stair tread piece covers the horizontal surface.
Schluter Strips & Metal Trim
Schluter strips are aluminum or stainless-steel profiles that protect tile edges and come in a few standard styles: Schiene/Jolly (flat edge), Quadec (square edge), and Rondec (round edge). For a decorative accent instead of a functional edge cap, a ceramic pencil liner or a wider chair rail piece adds a border or mid-wall band.
The right trim piece ultimately comes down to four questions: is it floor or wall, how thick is the tile, is the edge inside or outside, and does the look call for a seamless ceramic match or a metal accent.
Sealing Tile & Grout: Why, When & How
Porous materials, including natural stone, unglazed tile, encaustic and cement tile, crackle glazes, and grout, let water, oil, and cleaning products soak in, which causes staining, weakens the material over time, and invites mold in grout lines. A sealer fills those pores or forms a protective barrier, so a spill beads up instead of sinking in.
Do You Need to Seal Grout?
Yes — always. Grout is one of the most porous materials in any tile installation, and it should be sealed regardless of what’s sealed around it. Beyond grout, plan to seal natural stone (marble, limestone, travertine, slate, quartzite), crackle glazes, and encaustic or cement tile. When in doubt about a specific material, check with the tile manufacturer before skipping this step.
Penetrating vs. Topical Sealers
There are two categories, and most jobs only need one. Penetrating (impregnating) sealers chemically bond inside the material. They’re invisible, breathable, and long-lasting, and they’re the right call for floors, showers, and anywhere durability matters most. Topical sealers sit on the surface instead, which can add shine or enhance color, making them useful on countertops or decorative walls, but they wear and peel under heavy foot traffic, so they’re a poor fit for floors.
How to Apply Sealer (Tile & Grout)
- Clean thoroughly — remove all grease, dirt, and any old sealer with a pH-neutral stone cleaner.
- Let it dry completely — at least 24–48 hours after cleaning or grouting; trapped moisture prevents proper bonding.
- Apply evenly — use a brush, roller, or applicator pad, working in small sections without over-saturating.
- Buff off the excess — after 5–10 minutes, wipe away any sealer that hasn’t absorbed, before it hazes.
- Let it cure — keep the surface dry for 24–72 hours; full cure can take 5–7 days in heavy-use or wet areas.
The Water-Drop Test
The simplest way to check whether a surface still needs sealing: place a few drops of water on it and wait 10–15 minutes. If the water beads up tightly, the sealer is still doing its job. If it sinks in and leaves a dark ring or shadow, the surface is absorbing moisture, and it’s time to reseal.
Resealing Schedule by Room
| Area | Reseal every | Why |
| Kitchen countertops | 1–3 years | Frequent cooking, wiping, and oils/acidic foods wear the barrier faster |
| Bathroom vanities & showers | 1–2 years | Constant water, soap scum, and steam break the seal down quickly |
| Indoor flooring | 3–5 years | High-traffic entryways need more frequent checks than low-traffic bedrooms |
| Outdoor patios & surfaces | 1–3 years | UV exposure and weather degrade sealer rapidly |
To make a seal last as long as possible: skip bleach, ammonia, vinegar, and abrasive scrubs, which strip sealer almost instantly; clean daily with warm water and a pH-neutral cleaner; and wipe up spills — wine, coffee, oil — right away, even on sealed surfaces.
Hamilton Parker carries Miracle Brand sealers for most of these situations: 511 Porous Plus for crackle tile and non-polished stone, 511 Impregnator for polished stone, 511 Seal & Enhance for a richer “wet look,” and a dedicated Grout Sealer with a thin tip made for grout lines specifically.
Installation Basics
Even the right tile can fail if it’s installed the wrong way, so a few fundamentals are worth knowing before hiring an installer or starting a DIY project.
The Tile Council of North America (TCNA) publishes the industry’s approved installation methods, and a good installer will reference them by name. Beyond method, three things matter most: the substrate has to meet the tile’s requirements (flat, stable, and rated for the load), wet areas need a proper waterproofing system underneath the tile (not just behind it), and movement joints have to be placed correctly so the installation can expand and contract without cracking.
This is the one area of the whole guide where it’s worth bringing in a professional — or at minimum, having a knowledgeable showroom team review the plan before tile goes down.
Ready to Choose Your Tile?
Tile rewards a little homework up front: knowing the difference between ceramic and porcelain, what natural stone asks of you, which trim finishes a job cleanly, and how to keep it all sealed and protected. Get that right, and the tile you pick today is one you won’t be thinking about again for decades.
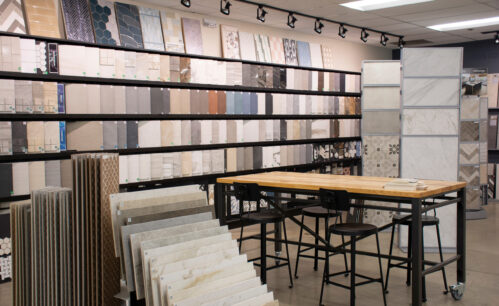
The fastest way to see and feel the difference is in person. Stop by a Hamilton Parker showroom in Columbus, Cincinnati, Cleveland, or Delaware. Our team can walk you through samples, talk through your project, and help you land on the right material the first time.